
Every car and seat MANUFACTUREs are different here are some ideas to help you make things easier
Beat the cold the safe way
|
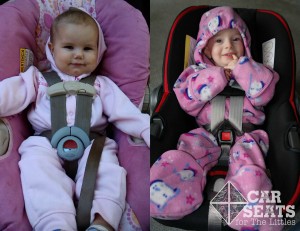
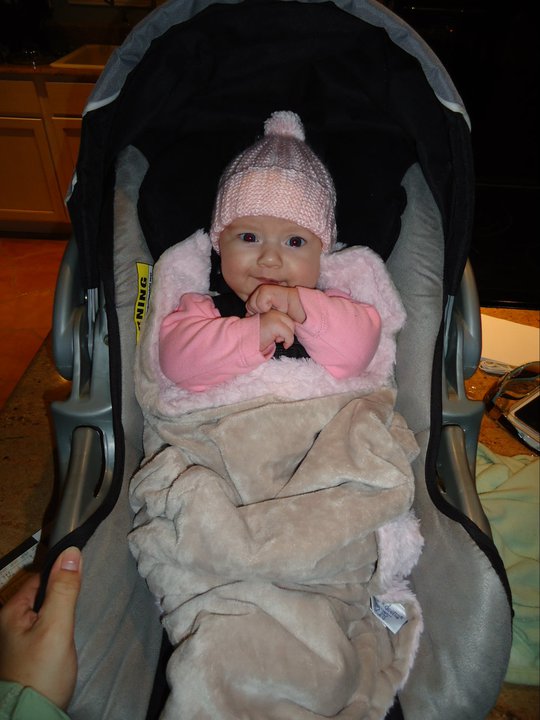
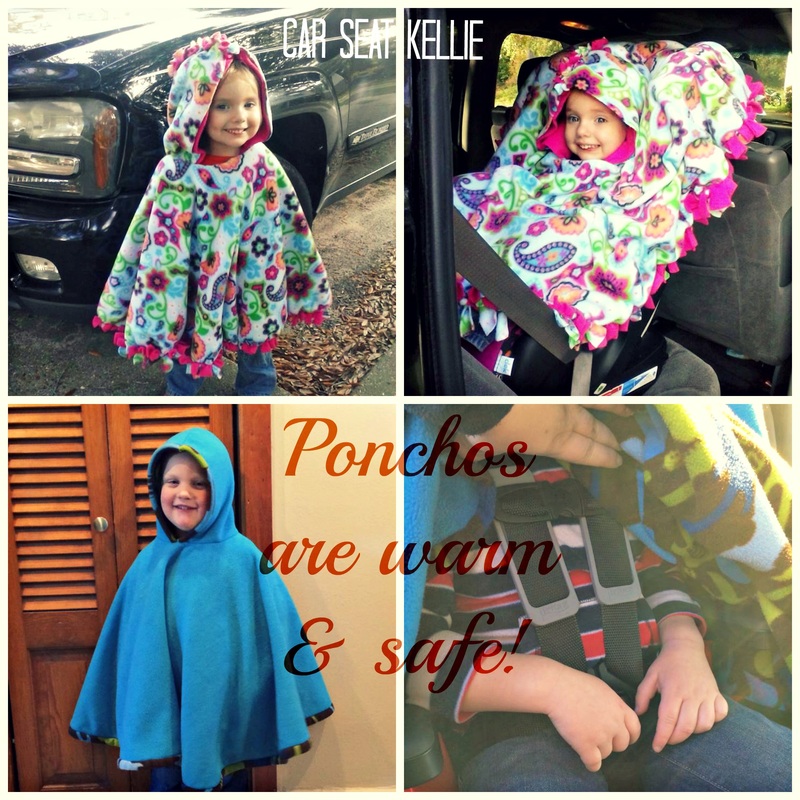
Big bulky, plush, puffy jackets and car seats don't mix. Snow suit and coats are for the snow, not the car. If you live in a cold winter weather climate you understand the hassle of bundling up yourself and your children. There are dangerous ways to use your car seat in the winter and then there are tricks to doing it right and safe! Check out the gallery on the right.
|

As you can see the image in the middle shows this child using a snow jacket with her harness and it looks snug too! Take a look at the last picture where you can visually see the compression that would happen to the coat during a crash. That much space could cause ejection which could lead to death!
|
|


Locking the seatbelt
|
|
Make sure your retractor is locked. Switch it from emergency locking, to automatic locking by slowing pulling the belt out all the way to the end. Then slowly letting it go back in. You should hear a clicking sound. This is now locked and you can not pull any more slack out from the belt.
|
install tricks
|
|
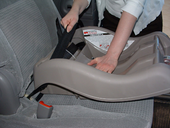
Every car seat you install needs to be installed tightly. To check the tightness of your car seat, put your hand on the belt path and try to move it with the same force as a hand shake. If it moves more than an inch left to right, it needs to be tighter.
Infant base- Place the palm of your hand on the center of the base and using your other hand to pull on the shoulder portion of the belt into the retractor. Infant seat no base- Did you know you can install an infant seat without the base? Check out this video made by the car seat lady. |
Another option is using LATCH (Lower Anchors and Tethers for CHildren). Using the same techniques to put pressure on the seat while tightening the lower anchor straps. Remember to NEVER USE BOTH THE SEAT BELT AND THE LOWER ANCHORS TOGETHER (except for Clek Foonf and Nuna Pipa as long as your vehicle manufacture allows it too)!
Top tether for forward facing car seats
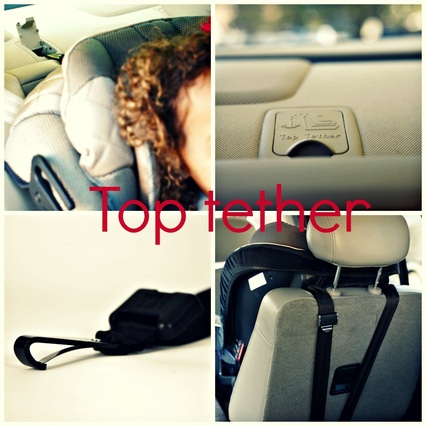
Part of the acronym LATCH is Tethers. A tether connector holds the back of the car seat and some booster seats against the vehicle seat to reduce the amount of forward and side movement.
A tether connector can reduce the distance that the child's head moves forward in a crash by 4-6 inches. The tether on the car sat can look different depending on your manufacture. In the bottom two images it shows two different types of tethers. The one on the left is the most common.
Check you car manufacturer to see where your top tethers are in each seating position.
All forward facing seats must be top tethered if possible!
Infant head support tricks
As mentioned in the page 'MISTAKES YOU MIGHT BE MAKING' adding head support to your seat isn't safe. The kind that you buy in the stores go behind your child's head. This "L" trick supports without the risk of anything going behind your child's head that can cause a slump, that could cut air supply off.
You'll need about 2-4 receiving blankets rolled or folded the long way, like a hot dog. Set each blanket or set of blankets beside your child's body. This creates an "L" with the blanket.
You'll need about 2-4 receiving blankets rolled or folded the long way, like a hot dog. Set each blanket or set of blankets beside your child's body. This creates an "L" with the blanket.
lexleeskids.org
Putting a new born in a car seat
Tiny little 6 pound babies can be scrunchy and so wiggly (oh so cute too)! Here are some tips on how to put your little one in a car seat.
- FIRST- Read the manual
- Loosen the straps all the way
- Place the baby's bottom all the way to the back crack of the seat
- Be sure the straps are coming below, or just at the baby's shoulders (see next tip if the lowest slot is above)
- Bring each strap over the shoulder like a back pack
- Click each side of the buckles into the stalk
- Now- slowly tighten the harness before you clip the chest clip (this will keep the clip from riding into your baby's neck
- Pull all of the slack out from the baby's hips and tighten some more
- Pinch test! Be sure you can't pinch any of the harness over it's self, checking at the collar bone
- Clip the chest clip and place level at baby's armpits
Crotch roll
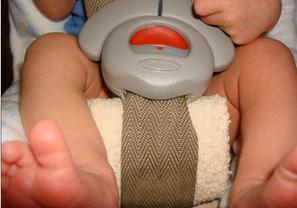
This is a trick that we use if someone has a seat that the lowest slot are higher than the baby's shoulder height. Sometimes it's because the baby tends to slump a lot which would cause the harness height to be too high for a rear facing child. Slumping is when the baby's bottom won't stay in the crack of the seat after being buckled in.
Using a tightly rolled washcloth simply stick it between the buckle stalk and the baby's diaper area.
Using a tightly rolled washcloth simply stick it between the buckle stalk and the baby's diaper area.
